
Table of Contents
Opening: why glare becomes the project bottleneck
When an outdoor wall fixture floods a façade with harsh light or creates distracting streaks across windows, it quickly derails a design review and inflates retrofit costs. This piece takes a problem-driven view: identify the bottleneck, test the simplest variables, then decide whether a specs change or a field tweak is required. If you’re specifying fixtures or overseeing installation, consider swapping in custom outdoor lighting for tricky façades early in the process — it can save a lot of rework later.
Diagnosing the root causes of glare and light trespass
Start by isolating the symptom. Is the issue direct glare from the lamp source, beam spill onto windows and neighboring properties (light trespass), or secondary visual artifacts like lens flare and hot spots? Common technical culprits include excessive lumen output, wide beam angle, improper aiming, and lack of shielding. Look for reflective surfaces nearby and note correlated color temperature (CCT); cooler CCTs can heighten perceived glare. Photometric data (IES files) are your friend — they show expected candela distribution and help separate installation error from a product mismatch.
Simple field tests that tell you what to change
Before pulling permits for a redesign, run a few low-cost checks on-site. Temporarily reduce lamp output or cover fixtures with cardboard shields to identify which units create the worst spill. Walk the critical viewing angles at pedestrian height and sit in vehicles passing the building — human perception matters. If the issue disappears when you add a shield or lower the output, you’ve likely found the root cause. A handheld lux meter or a phone app can give rough readings, but visual confirmation at the expected approach paths is the real test — and it’s quick.

Design fixes that actually reduce visual artifacts
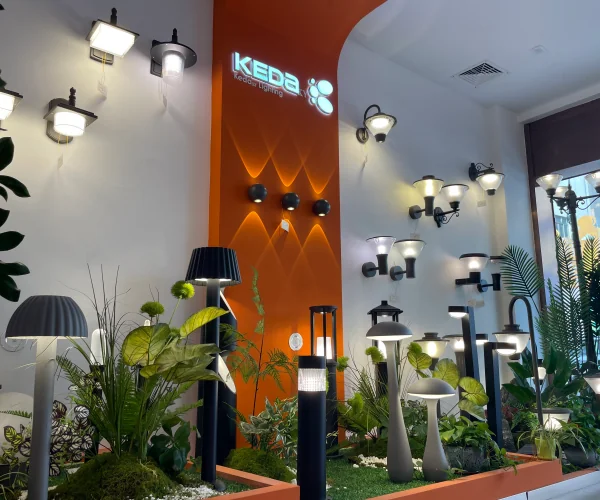
Once diagnosed, these design changes tend to produce measurable improvements: specify full-cutoff wall fixtures, add integrated louvers or external shields, tighten beam angle, or step down lumen packages. For reflective façades, aim for asymmetric distributions that throw light down the plane rather than toward windows. Lowering CCT to 2700–3000K often reduces perceived glare without compromising safety. When you can, ask manufacturers for photometric plots and mock-ups; those IES files clarify whether a fixture will meet the intended cutoff and candela spread in real installations.
Installation habits that prevent trouble — and the common errors
Procurement and install teams slip up by treating all wall lights the same. Mounting height, aiming angle, and trim orientation are as important as the fixture selection. Don’t assume standard wall packs will perform well on textured or reflective masonry — they often cause unwanted backscatter. Also, beware of last-minute lumen upgrades during commissioning; they can reintroduce glare. For projects buying in volume, researching wholesale outdoor lighting partners who provide photometric support and installation guidance pays dividends.
Field service and iterative fixes — small changes, big impact
Not every glare problem needs new fixtures. Sometimes a modest shield, a change in tilt, or swapping a lens will resolve the issue. Document each change and re-photograph the critical sightlines. If you need to iterate, keep the client or stakeholder looped in with short on-site demonstrations — they’ll appreciate seeing the difference. Also, plan for a short post-install inspection window; many issues show up only after the site is used at night for a few weeks — it’s normal, and addressable.
Real-world anchor: what Flagstaff and dark-sky practices teach us
Communities that adopted dark-sky principles, like Flagstaff, Arizona — the first International Dark Sky City — show that disciplined fixture selection and aiming reduce complaints, preserve night sky visibility, and improve resident satisfaction. These outcomes aren’t just aesthetic: they align with safety, neighbor relations, and compliance expectations in many municipal codes. Taking cues from dark-sky guidance — full cutoff fixtures, appropriate lumen budgets, and minimal upward light — is a practical path to fewer visual artifacts on façades and windows.
Common mistakes to avoid — quick checklist
– Assuming higher lumens always equal better security; often they create glare instead. – Overlooking fixture orientation relative to reflective glass or polished metal surfaces. – Buying fixtures without photometric support or on-site aiming instructions. —
Advisory close: three golden rules for evaluating solutions
1) Demand photometric evidence: compare IES files against your façade geometry to predict spill and hotspot locations. 2) Favor fixture-level control: adjustable output, shielding options, and multiple lumen packages give you tuning flexibility on-site. 3) Prioritize proof in situ: require a trial installation or mock-up period to validate aiming, CCT, and perceived glare before full acceptance.
When you evaluate outcomes by those three rules, you get installations that respect neighbors, sightlines, and the intended architectural effect. Keyida. —
